Laser Marking for Medical and Laboratory Instruments
Laser Marking for Medical and Laboratory Instruments
Quick verdict: Instruments are cleaned and sterilised constantly, so identification has to be permanent. Laser marking provides the durability — but the regulatory requirements are yours to verify.
Medical and laboratory instruments are cleaned, sterilised and handled constantly. The identification on them has to survive conditions that destroy labels and wear away ink — and it has to stay legible on small, curved, expensive objects that cannot be replaced if they are damaged.
That combination is what makes this one of the more demanding marking jobs. It is not difficult to mark an instrument; it is difficult to mark it in a way that still reads clearly after the two-hundredth autoclave cycle. Here is how the process works, which machine suits which material, and where the limits are.
Why laser for medical and lab instruments
Permanent — the mark is part of the surface, so it survives autoclaving, chemical disinfection and repeated cleaning where labels and ink do not.
High contrast — legible serial numbers, sizes and codes on small, curved surfaces.
Precise — fine marking on delicate instruments without removing material or altering geometry.
Non-contact — the beam marks without pressure, so thin-walled and delicate tools stay intact.
Traceable — every instrument in a set can carry a unique identifier rather than a batch number.
The comparison that matters is not laser versus ink — it is marking versus replacing. An instrument that loses its identification becomes unaccounted for in a sterilisation cycle, and in a hospital or laboratory that is a traceability problem, not a cosmetic one.
What gets marked
Item
Mark
Purpose
Surgical instruments
Serial numbers, unique IDs
Traceability, sterilisation tracking
Instrument sets and trays
Set IDs, department codes
Inventory, returns
Dental tools and handpieces
Logos, IDs, sizes
Identification, ownership
Laboratory tools and racks
IDs, position codes
Tracking, calibration
Metal and plastic devices
Serial numbers, QR or data matrix
Device identification
Calibration standards
Reference IDs, dates
Metrology traceability
Two families dominate this work: stainless steel, which is the overwhelming majority of reusable instruments, and engineering plastics, which appear in housings, handpieces, trays and disposable-adjacent parts.
Stainless instruments: the fiber job
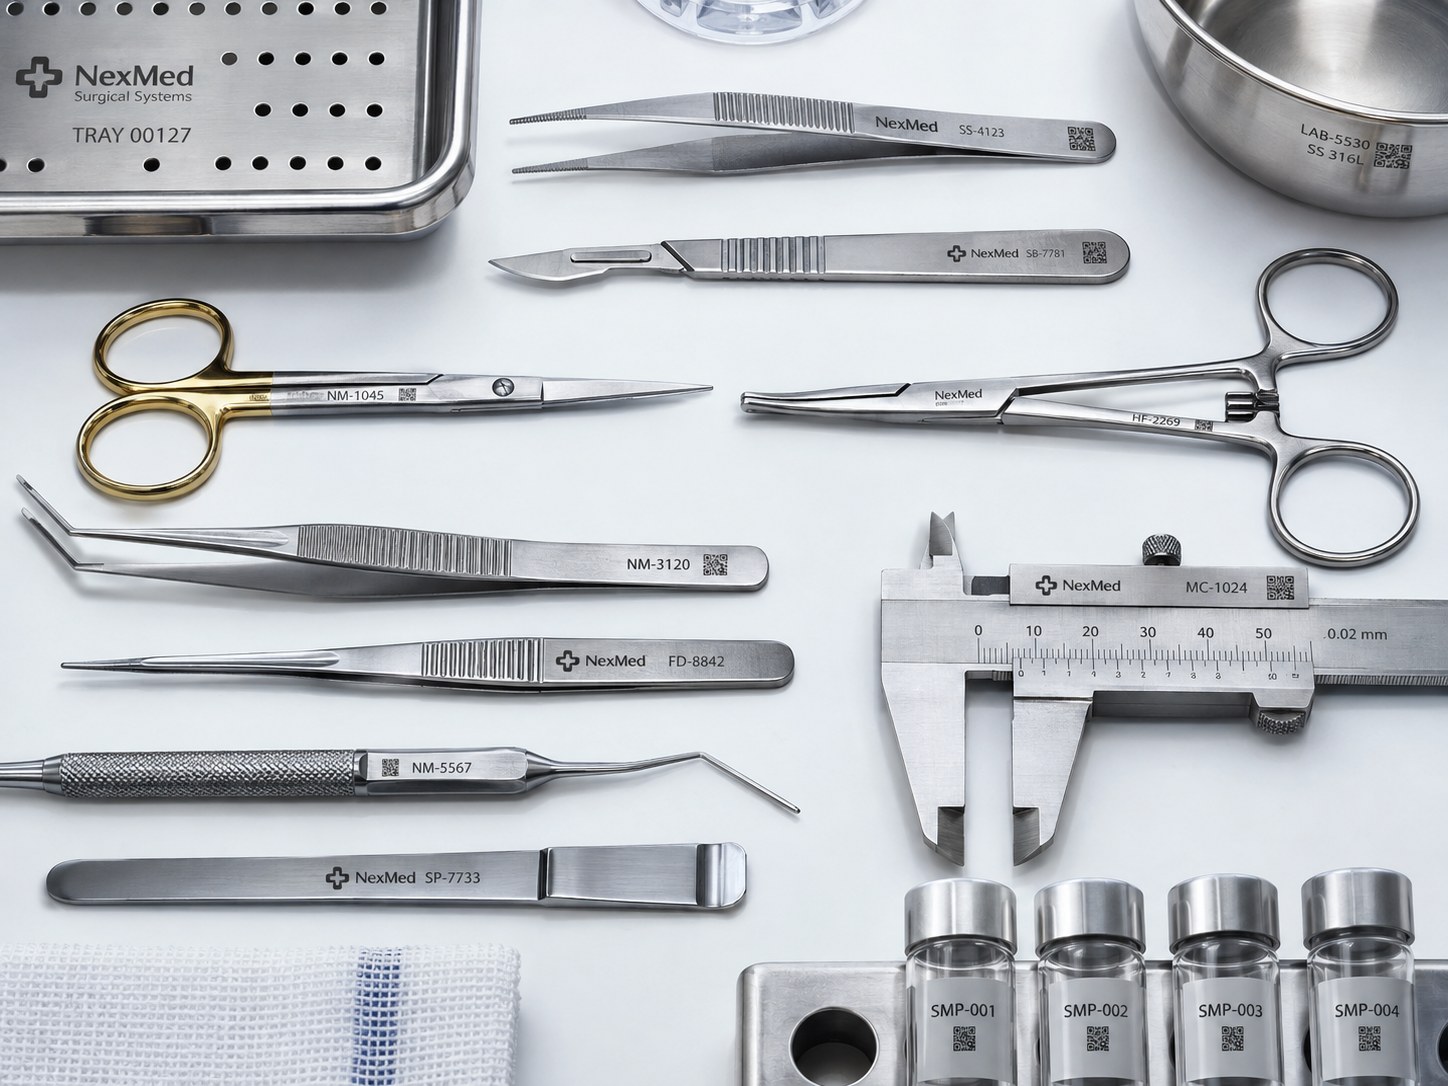
Stainless is where a fiber or MOPA laser belongs. The beam is absorbed by the metal itself and produces either an annealed mark — a dark, smooth change in the surface with no material removed — or a shallow engraved mark where a tactile result is wanted.
Annealing is usually the better choice on surgical instruments, and it is the reason to use a MOPA source rather than a plain fiber one. Because MOPA lets you control pulse and frequency, you can tune the mark to the alloy and the finish instead of accepting one fixed result. It matters on instruments because the surface you are marking is rarely plain: mirror-polished, satin, passivated and bead-blasted stainless all behave differently, and a setting that is perfect on one produces a washed-out mark on another.
Plastic devices: the cold UV job
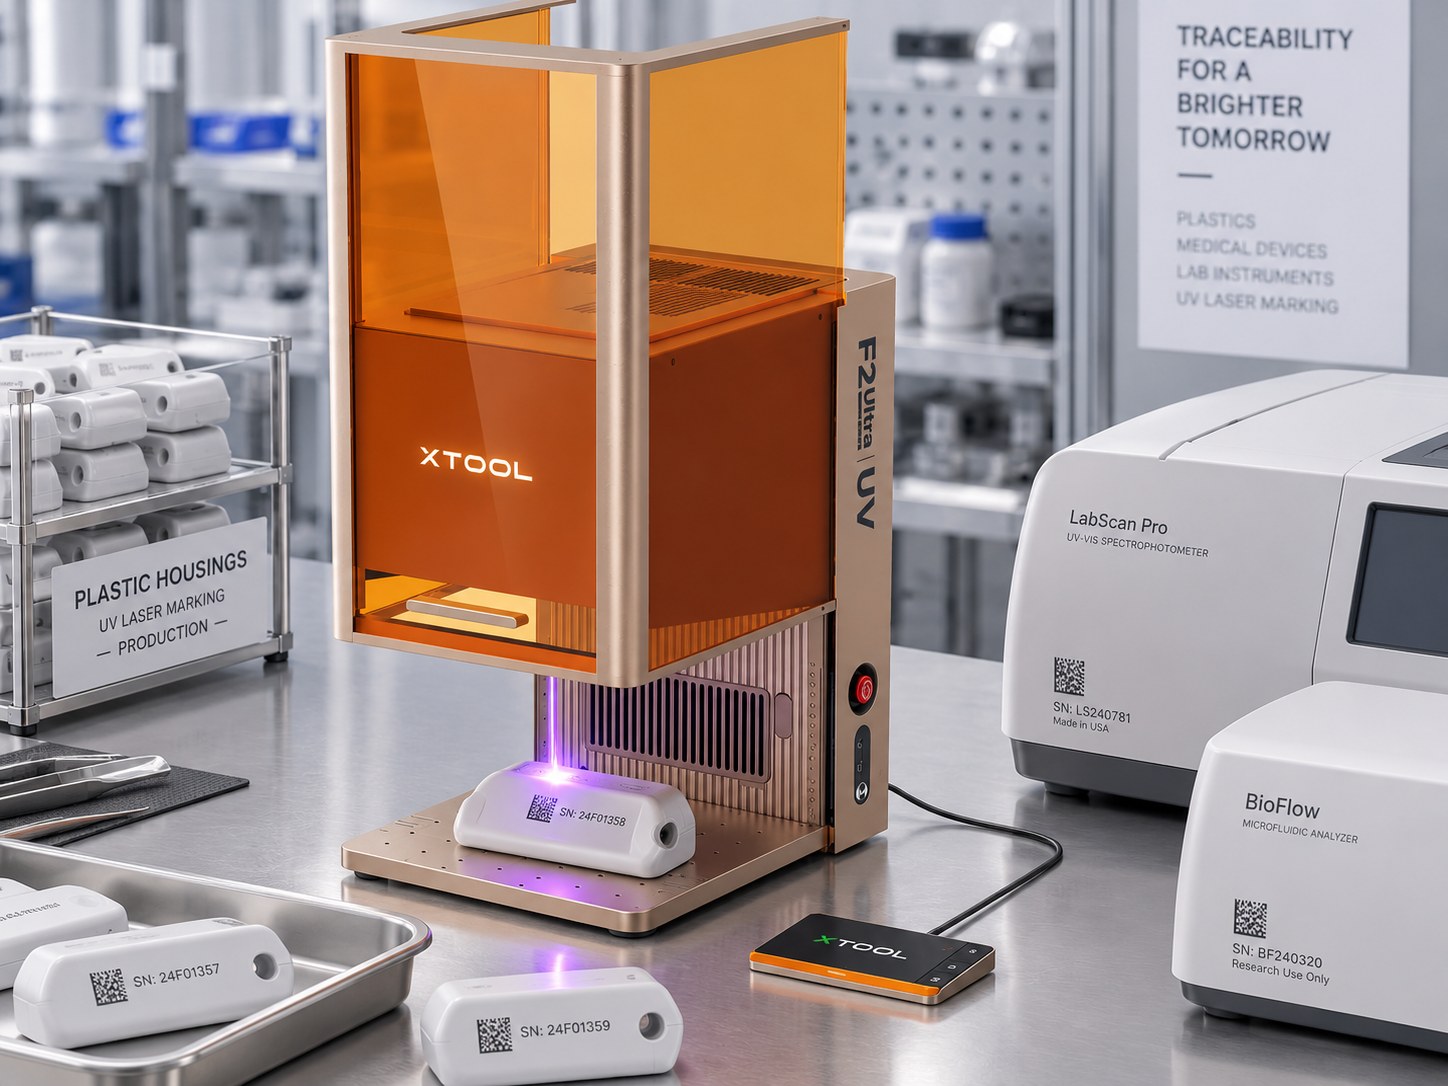
Plastic housings are marked with UV: the beam reacts with the surface instead of heating it, so the part is never melted or distorted.
Plastic housings, handpieces and heat-sensitive components are a different problem. A standard fiber laser marks plastic by heating it, which on a thin medical housing means melting, warping or discolouration — and on a device that has to be sterilised, a distorted housing is a failure.
A UV laser at 355 nm works on the surface instead. Its short wavelength breaks molecular bonds directly rather than burning through the material, so the part never gets hot enough to deform. This is cold marking, and it is why UV is the correct process for plastic devices rather than merely a preferable one.
The right machine
Machine
Fit for instrument marking
xTool F2 Ultra
60W MOPA fiber with frequency control: annealed or engraved marks on stainless instruments, trays and metal components. Colour marking available on some stainless finishes
xTool F2 Ultra UV
5W UV at 355 nm, spot under 10 microns: cold marking on plastic devices, handpieces and heat-sensitive parts
Stainless instruments are marked with the F2 Ultra on its fiber source. Plastic devices and heat-sensitive components are marked with the F2 Ultra UV, which is cold and will not melt or distort the part.
Where a workshop marks both — which most instrument servicing and manufacturing operations do — the split is usually along material lines rather than by product. The machine choice follows the substrate, not the instrument.
Legibility at instrument scale
An instrument mark fails in two different ways: it can wear off, or it can simply be too small and too low-contrast to read. The second is more common than people expect.
Curvature. A round shaft presents only a narrow band in focus at once. Marking on the flat of a handle is easier and more legible than wrapping a number around a curved shank.
Character height. Small marks look impressive under magnification and fail in use. Set the size by what a technician can read under normal lighting, then confirm the machine can hold that contrast at that size.
Contrast, not depth. On stainless, a dark annealed mark on a satin surface usually reads better than a deep engraved one, because depth collects residue and shadows.
Orientation. Marks placed where the instrument is routinely gripped or wiped wear fastest. Place identification where it is handled least.
What survives sterilisation and cleaning
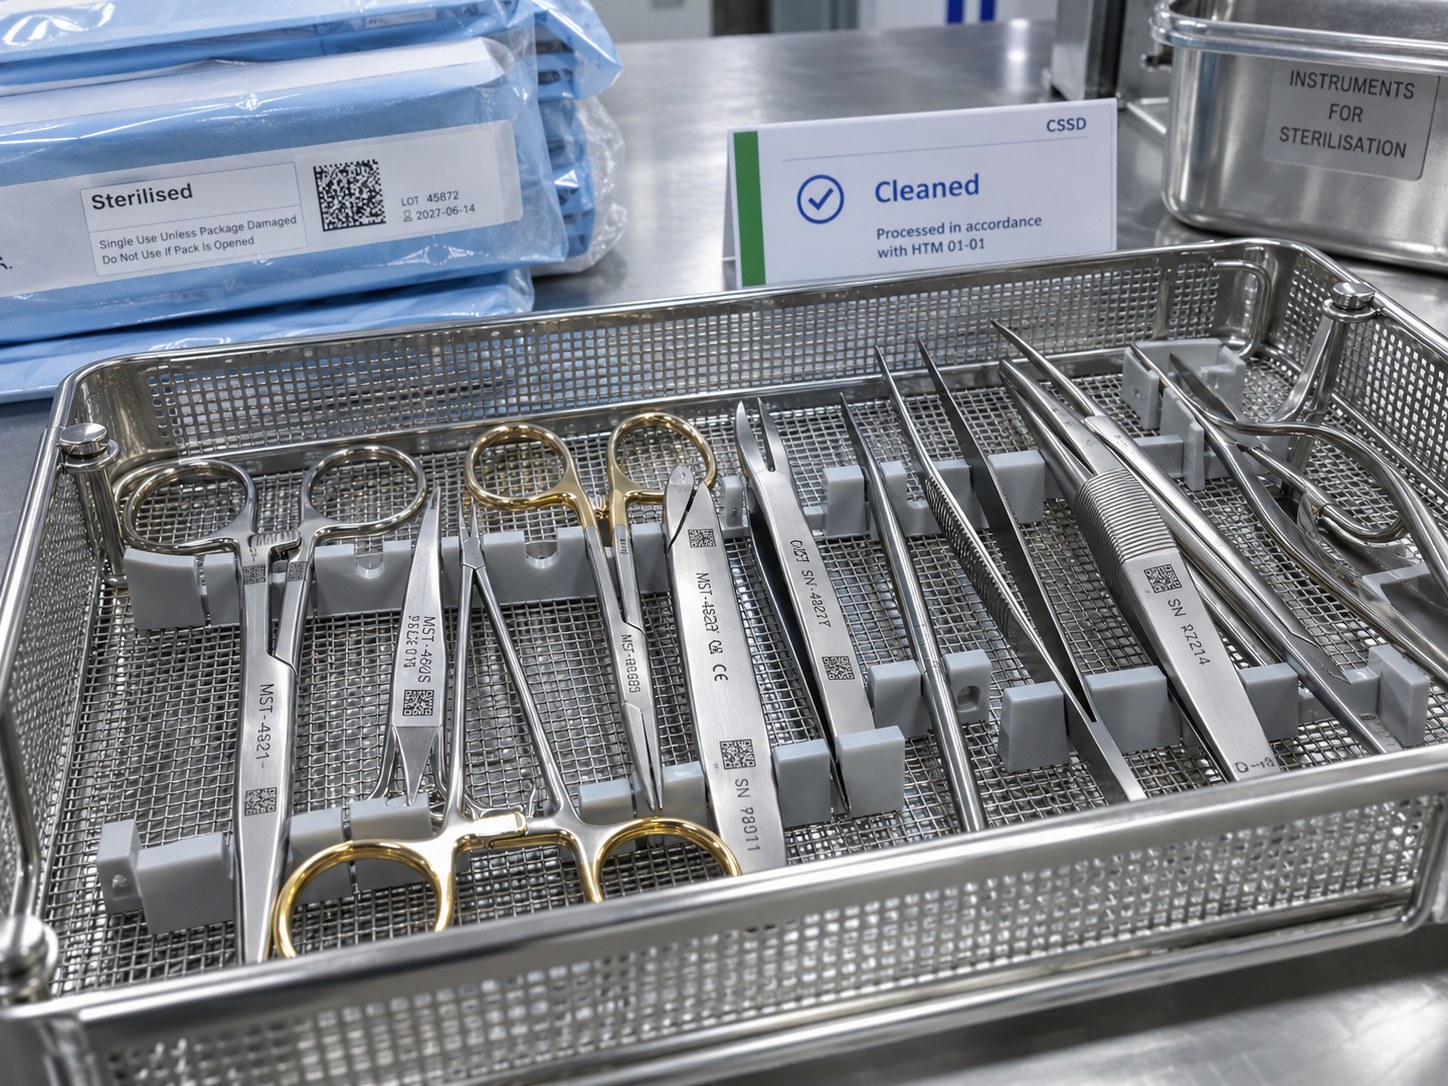
The mark has to survive the whole cycle, not just the first one: washing, disinfection and steam sterilisation.
The reason a laser mark belongs on an instrument is not that it is pretty — it is that it is not a separate object. A label can lift at an edge and come away. Ink can be dissolved. An engraved or annealed mark is part of the instrument and weathers with it.
What actually challenges the mark is the cycle: steam and heat in an autoclave, alkaline detergents, enzymatic cleaners, disinfectants and mechanical washing. A well-set mark on stainless and on most engineering plastics comes through that unharmed.
The honest caveat: aggressive chemistry is still aggressive. Some solvents and some sterilisation regimes will attack particular polymers, and no one can predict that from a datasheet alone. Test with the actual cleaning agent and the actual cycle you use — not a generic one.
Fixtures and batch marking
Marking one instrument well is easy. Marking every instrument in a department consistently is a process question, and the answer is fixturing.
A locating plate or a machined pocket holds the instrument in the same position for every cycle, so the identifier lands in the same place without an operator aligning it by eye. That gives you two things: consistency across the set, and a shorter cycle time because nobody is adjusting anything between parts.
For instruments supplied in sets, mark the whole set in one pass on a single plate rather than one piece at a time. Where individual tools are short and cylindrical, a rotary axis lets the machine mark around the circumference rather than only on one face — but on the curved shank of a fine instrument, marking along the axis is usually more legible than wrapping text around it.
Common problems and fixes
Problem
Likely cause
Fix
Mark washed out on polished stainless
Surface reflecting rather than reacting to the beam
Adjust MOPA frequency and pulse; test on the actual finish
Mark too faint after cleaning cycles
Mark sitting only in a surface layer
Increase depth slightly, or switch to an annealed mark that survives
Plastic housing warped or discoloured
Heat from a fiber laser on a heat-sensitive polymer
Switch to UV cold marking
Identifier in a different place on each instrument
No fixture — operator alignment by eye
Add a locating plate or pocket
Text illegible although it is technically present
Too small, or placed on a curved surface
Increase character height; move the mark to a flatter face
Mark collects residue and looks dirty
Deep engraving trapping debris
Use a shallower annealed mark instead
A note on regulatory requirements
Marking for medical devices can carry regulatory requirements — for unique device identification, traceability or compliance — and those requirements vary by market and by device class. The requirements are also the manufacturer’s responsibility, not the marking supplier’s.
Laser marking provides the durability and legibility these requirements typically demand: a mark that survives reprocessing and stays readable for the life of the instrument. What it cannot do is make a device compliant. The specific standards, the data format for a unique identifier, and where on the device the mark must appear are yours to verify against your device’s regulatory obligations. We do not make compliance claims on your behalf.
Frequently asked questions
Can a laser mark survive autoclaving? A properly set mark on stainless steel and on most engineering plastics comes through repeated steam sterilisation unharmed, because the mark is part of the surface rather than applied to it. Confirm on your own materials and cycle rather than relying on a general answer.
Does marking an instrument damage it? A fiber or UV laser mark is non-contact and removes little or no material, so it does not alter the geometry of the instrument. Deep engraving is a choice, not a requirement — an annealed mark is usually the better option on a functional surface.
Can you mark a unique ID on every instrument in a set? Yes. Variable data costs nothing extra in tooling, so each instrument can carry its own identifier rather than a shared batch number. The work is in collecting a clean list and applying it in a single batch.
Which is better for instruments — fiber or UV? It follows the material. Stainless steel takes an annealed or engraved mark from a fiber or MOPA laser. Plastics and heat-sensitive parts need UV, because a fiber laser would melt or discolour them.
Can the mark be made without changing the instrument’s appearance? To a degree. An annealed mark on stainless is a dark, low-relief change rather than an obvious engraving, and it can be kept small and placed discreetly. How visible it ends up is a design decision you make with a sample in hand.
Do you mark sample instruments before we commit? Yes — that is the sensible way to decide. Send a sample and your marking requirements and we will mark it so you can check contrast, permanence and legibility before specifying anything.
The finish, alloy and required mark size all affect the result, and no two instrument ranges behave identically. Send us a sample instrument — or a photo with your marking requirements — and we will mark it, so you can verify contrast, permanence and legibility before you commit to anything.
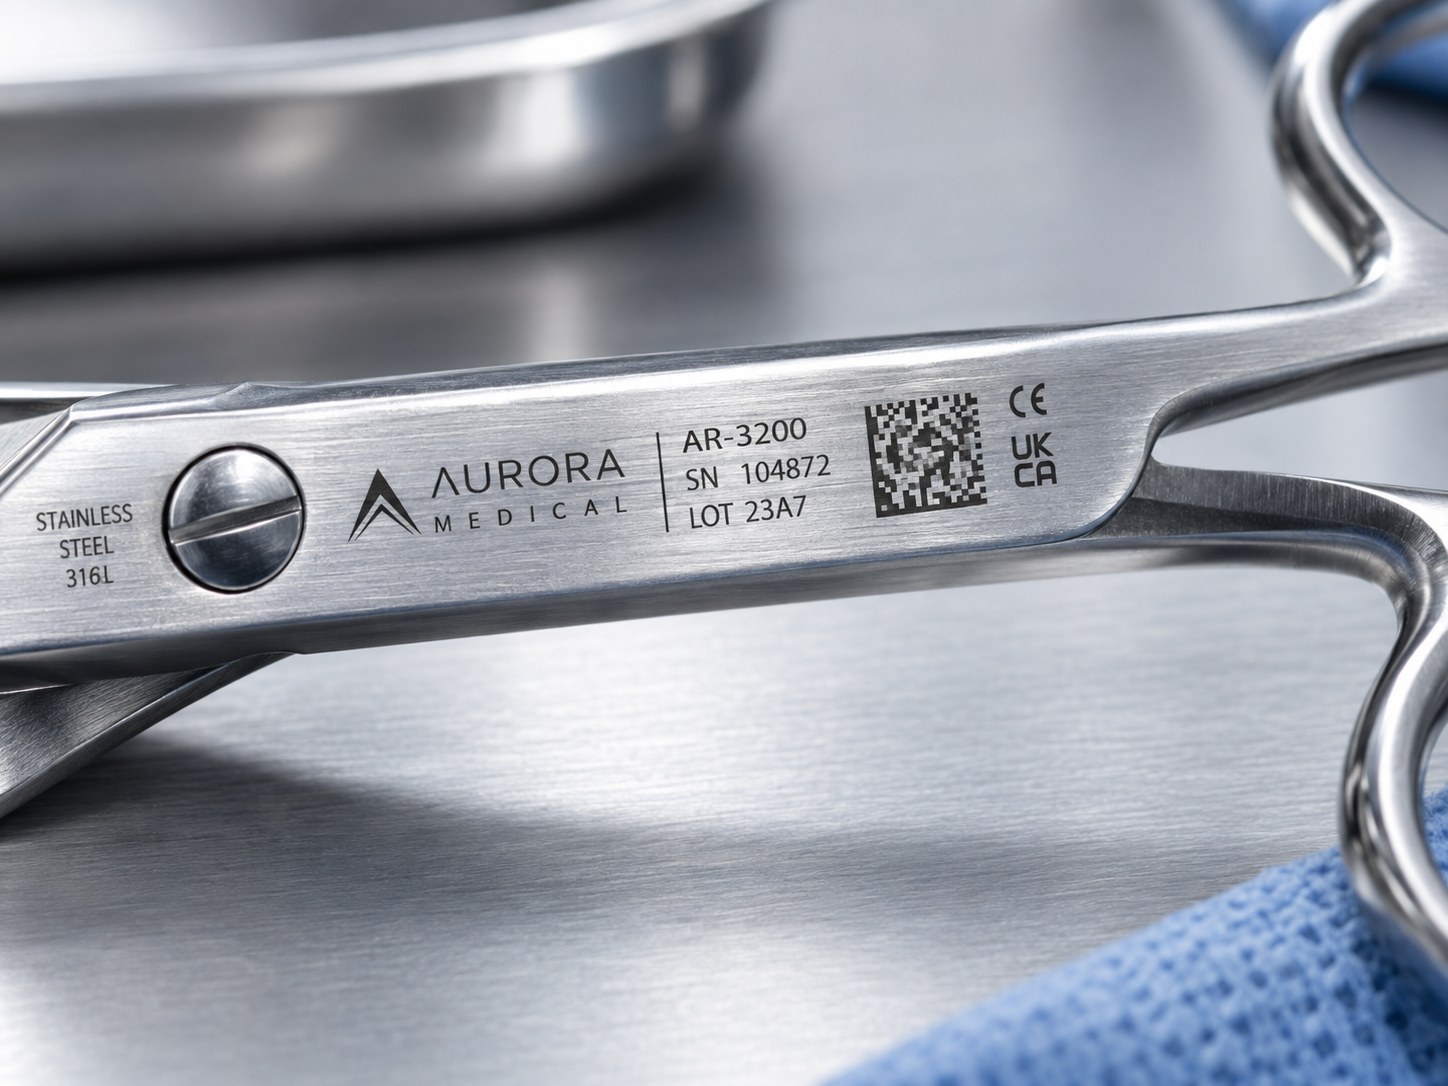
What a finished instrument mark looks like: high contrast, and fine enough to carry a serial number and a machine-readable code.
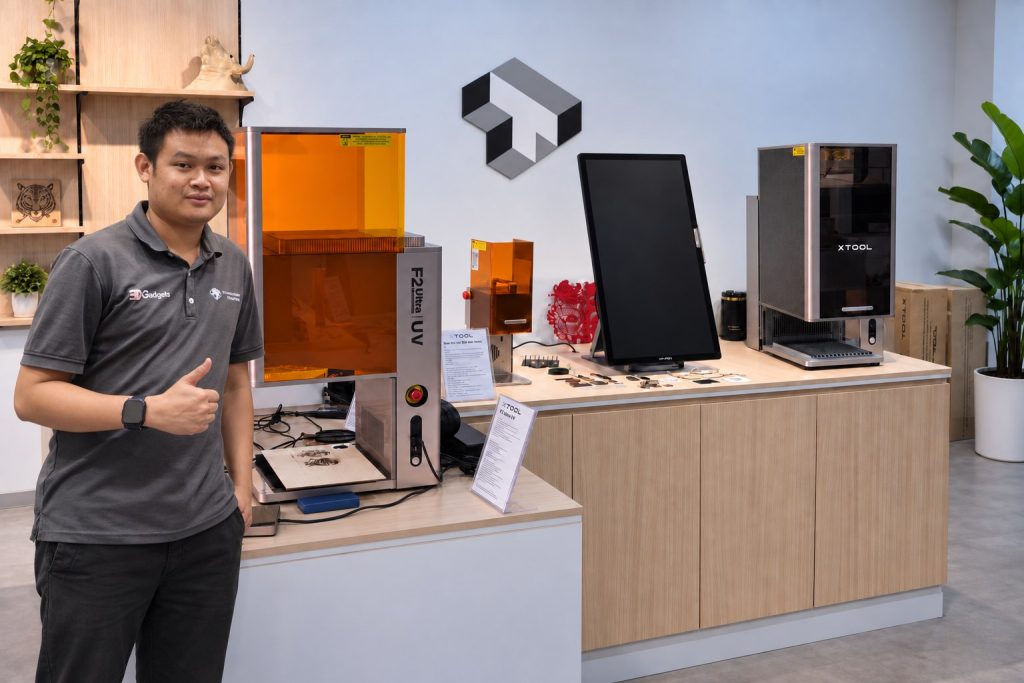
Our Kuala Lumpur showroom. Bring your product and we will engrave it in front of you, so you see the real result before you buy.
Laser engraving is easiest to judge in person. Tell us what you want to mark and bring a sample to the showroom, or send us a photo and we will tell you which machine and power fits the job.